Wednesday, April 25, 2012

DIY Brush Cleanser


     Cleaning your brushes is a must! Deep cleaning your brushes should be on your planner every week and spot cleaning them is every time after you use it. Although, I gotta admit, I'm lazy about cleaning my brushes. It's such a chore!!!!! But cleaning your brushes will prevent break outs and help your brushes last longer. Spot cleaning your brushes will show your products' true color, not a mix of the eyeshadow you used yesterday and the one you want to use today. The recipe that I'm going to share to you is fairly simple. I actually got it from Enkore, but I doubled the recipe so I don't  have to keep on making it. You might even have all the ingredients in your house already!

Recipe:
Spray bottle
2 cups of purified water
1 tbsp of antibacterial soap (choose a color you prefer)
1 tbsp of a gentle shampoo
1 tbsp of extra virgin olive oil or a liquid leave in conditioner
1/2 cup of alcohol (I prefer 90% or more)

     The spray bottle could be bought anywhere such as Target, Walmart, Dollar Tree or any beauty store. Just pour all the liquids in the bottle and shake! Make sure you shake the mixture every time before you spray it onto your brushes. You don't want to get your brushes too wet when spot cleaning it, just enough to get the product out and onto a paper towel. But, if you prefer dipping the brush in a bowl of the cleaner, go ahead. The drying process will just take longer. There is no need to rinse the brush after spraying the cleanser. I also like spraying this on my brushes after deep cleaning it to let the olive oil moisturize the brush bristles and the alcohol fight any remaining bacteria. Remember to dry your brushes flat or upside down! I hope this helped! I'll try to post a video on my YouTube channel: agapesbeautyarmour and attach it to this post. Have a wonderful day!!!!!

Monday, April 23, 2012

M.A.C. Haul

  So, the mall near my house always had M.A.C. in the Macy's department store. But this spring season, M.A.C. opened up a new branch in the mall. They have everything that I can get from the M.A.C. section from the department store and more! I was actually able to create my own palette! I've been dying to create one! In this haul, I mostly got blushes that I think would be great for an everyday wear and lipsticks with fun colors!

Haul:
Studio Fix pressed powder foundation (C40)
6pan blush palette
Blushes:  
  Sunbasque
  Harmony
  Springsheen
  Gingerly
  Flirt and Tease
  Pinch Me
Lipsticks:
  Craving (Amplified)
  Crosswires (Creamsheen)
  Jubilee (Lustre)

   That's everything I got. I'm gonna purchase the Fix and Perfect setting spray when I can and I'll let all of you know how it went! I really loved my foundation because it evens out my skin tone giving me a full coverage when needed without looking cakey. The blushes are amazing since they last all day long and have great pigmentation. The ones I bought are also great I'm giving me definition on the cheeks. I specifically bought the blush in Harmony as my contour. Many people use the blush Blunt to do the same thing. The lipsticks are so pigmented that I don't need to apply a lot to have the desired effect. They also keep my lips super soft and lasts for a long time! The price is actually on the low end if you compare them to other high end products. But if you compare them to other drugstore makeups then they are quite expensive. In this haul, I realized that I extremely like M.A.C. products and can't wait to buy some more!

M.A.C. Haul Video! ;)

Friday, April 20, 2012

Wedding Bliss!


  My aunt got married this weekend and it was a blast!!!! Awesome people, yummy food, over all a great celebration! The venue was at a golf course overlooking the city. There was a gazebo where the ecstatic bride and groom shared their vows, and towards the end of the ceremony, the sun was ready to take it's rest leaving pink and orange clouds on the horizon. We all walked to the hall for the food and party. Beautiful speeches were given that even brought tears to a couple of my uncle's eyes. We are so happy for my aunt and her lucky husband that thinking about it just lifts my spirits up. When I talked to my aunt about her fiancĂ©e before the wedding, I could just hear the happiness in her voice and see the sparkles in her eyes. I know they're going to be happy together!

    The party was a success! The bouquet was thrown to the maid of honor, the bride's sister, after many attempts, which was hilarious! The garter was caught by the best woman, the father and daughter dance was beautiful, and the cake had personality! Lol! There was a lot of dancing involved, they might have been one song that I didn't dance to but for the rest, I was shaking my goodies like there's no tomorrow! Lol!!! It was great to see my family and friends, I am so glad I took time off from work to attend.
That's me applying the lip creams to my grand ma!

  The color scheme was olive green and I designed my makeup to match. I made sure to keep my lip creams, lip gloss and my Mally Evercolor Poreless Face Defender in my purse for touch ups! I also ensured to wear waterproof eye makeup just incase I get teary or sweaty from dancing. These are the products I used:


Rimmel Fix and Perfect Pro Primer

Revlon Colorstay Foundation

Urban Decay De Slick Setting Spray

Urban Decay Primer Potion in Eden

Smashbox  Photo Op Mega Palette in the tri Quick Take

Stila Waterproof Smudgestick in Lionfish

Rimmel London Exaggerated Waterproof Eyeliner in Precious Gold

Maybelline Falsies Waterproof Mascara

Maybelline Define a Brow pencil in Medium Brown

Garnier BB Eye Roll On

Coastal Scents Eclipse Palette

MAC Studio Fix Foundation

MAC Blush in Harmony

MAC Blush in Pinch Me

NYX Soft Matte Lip Cream in Antwerp and San Paolo

Mally Lip Gloss in Flirty

Mally Evercolor Poreless Face Defender

Ardell False Eyelashes in 135


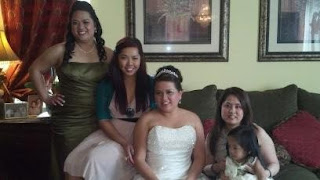
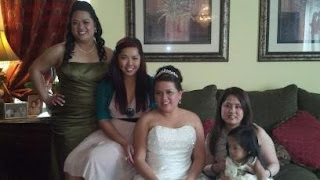
A photo with my aunties and cousin. I did my little cousin's makeup too!

Isn't she adorable?!?!?!?!


    So that's everything! I'll post a video to go along with this so you can see how I did my makeup! This look would be great for prom or any formal event. Heck! Wear it on a night out and you would look beautiful!

    The whole night was so much fun it lasted until morning! My aunt, her best friend, a couple of my cousins and I went to a casino after changing out of our party dresses... It was funny since all we did there was eat! It was still a blast!


    I am so happy for the bride and her lucky groom! Best wishes to both of them! And  for my brand new uncle: welcome to the family!


Question:  My aunt, the bride, had neutral eyes, rosy cheeks and pink lips. Basically, a natural look with a pop of color. How about you? What kind of makeup look would you prefer on your wedding day?

Tuesday, April 17, 2012

NYX Soft Matte Lip Cream Review

     I've always loved matte lipsticks and I wanted to try a matte lip cream. NYX offers the Soft Matte Lip Cream and I bought the shades Antwerp and San Paolo. I love these shades! Antwerp is coral with pink, while San Paolo is just pink! A bright pink perfect for spring and summer. I especially love this color on dark skin tones since it just pops!
    The lip creams apply on with a wand like many lip glosses but these have a thicker consistency. It's like a melted lipstick. I highly advise exfoliating your lips and apply chapstick prior to putting on the lip cream because it tends to feather out. But if your lips are in good shape then these babies are amazing! They lasts so long! I mixed both shades onto my lips and wore it to my aunt's wedding last weekend, I ate, drank, celebrated their union and I still had it on! Actually, the bride's makeup artist saw my lips and adored it so he wanted me to apply it on the bride, maid of honor and the mother of the bride! One of the bride's maid was wearing San Paolo too! I do like wearing this with a little bit of lip gloss to the center of my lips to add more dimension. Over all, I would definitely buy this product again! Just make sure your lips are in their tiptop shape!


Easter Fun and How I Stayed Shine Free!


    Well, my Easter was so much fun! Although I did work most of the day, I got to go to my boyfriend's grandma's house after work. It was a blast!!! I love spending my Easter there! I got to eat great food, sweated through a few badminton games, learned how to play shuffle board, beat everyone at HORSE the first time, lost to my boyfriend the second time, and lounged outside having a great time! The weather was great! The sun was out but it wasn't sweltering hot. I did sweat, so I was worried about my makeup. Surprisingly, my makeup stayed on really well!!!!! My foundation was still there like I just got done putting it on, my blush was not as intense but I was glad that happened because it turned out nicer, my contour was all there, and my lashes were as curly as ever. The only downside were my lipstick was all gone, I did eat and had a couple drinks, and my eyeshadow was a little creased, I did have my shadow on for more than 15 hours. It was bound to crease then. I did touch up my makeup using Mally's Face Defender, the clear mattifier and sprayed on Urban Decay's De Slick setting spray. I really think those products kept me matte and unshiny the whole day. Oh, by the way, I have really oily skin, so what I saw when I got home surprised me so much! I was super happy that I wanted to share it to you all!


DIY: Lip Exfoliator


    It's time of the year again when bright lipsticks are a must! They are just so fun to wear, it makes me happy just looking at them! What is bit disappointing is seeing them all feathered out. Bright lipsticks tend to make them stand out more and it just doesn't look good -- at all!!!!!!!! If you're lips are dry that they're peeling, those dead skin are what causes the nasty feathery look. When this happens, I exfoliate my lips then tada! My lips are soft and most important of all SMOOTH! Lip products glide on easier and your lips are healthier! The recipe? It's super easy that you might already have them in your pantry!!!!!!


Recipe:

A small jar or bowl
1- 11/2 tbsp of brown sugar
1-2 tsp of honey


      Mix the sugar and honey in a bowl or jar. If you want to add more sugar, go ahead! Rub this on your lips GENTLY! Rubbing it too hard will cause your lips to feel sore. Wipe away the exfoliant with a wet towel. Now, grab that bright lipstick, then glide it on to your soft and smooth brand new lips! Mwah! I hope this helped!

Saturday, April 7, 2012

bareMinerals Insider Introducing the Hydrating Lip Tint Review


         I've been wanting try some more bareMinerals product apart from their foundation kits and I've mentioned before that a thriftier way to do it is to buy value packs. bareMinerals have some great packages and I actually saved about $50! I loved most of them and when I run out I will definitely buy some more! Here are the products included and what I thought of them:

Prime Time Primer Shadow    
       I love this product! It's perfect for those on the go moments and times when you need a quick fix! There's no need to apply a primer prior to this because the shadow itself already has a primer! The color is very pretty and natural that it would look great on anyone and any look! It does have a slight hint of shimmer which can bring focus to your eyes! I will buy this again if I run out!

Flawless Definition Volumizing Mascara 
       I like this mascara. It's not too clumpy and thick. It is very black. The brush is fairly traditional that it hugs my sparse lashes and makes it look like I have more! I wouldn't buy it again though, just because there are other cheaper mascaras from the drugstore that gives me the same result.

Round the Clock Waterproof Eyeliner
       The 3 pm shade is perfect!!!! I prefer wearing dark brown eyeliners compare to black because they don't make my eyes look smaller, so this works out great for me! The brown does look more bronzy because it has a little shimmer which makes me like it even more since it's different from other brown eyeliners that I have. It last aaaaaallllllllllll day long!!!!!! I'm not kidding! I have plenty of eyeliners that say they wouldn't smudge or fade. But for some reason they do on me. Well, I do have oily skin so that might be a reason! Lol! But this liner doesn't smudge and the intensity looks the same as when I just put it on in the morning. The only thing I don't like about it is I have to sharpen it myself. Call me lazy but I'm not very good at sharpening my eyeliners... :{ Also, you can't just buy it individually, well at least to the stores I've gone to. You have to buy an insider pack to receive and eyeliner from the Round the Clock waterproof line. Wow I wrote a lot! Just shows how much I really like this product! Lol!

Blush in Peek-a-Boo
         I adore this blusher! It gives my face a nice flushed look. You know that kind of color you get after working out. I do think this would look great on anyone. It lasts all day and comes in the click, lock and go innovation Bare Minerals created. I would definitely buy another one!

Hydrating Lip Tint  
       At first look, I was disappointed because I thought the tint would be pinkier, but it's more natural with a hint of pink. It's still very pretty and would look perfect for that natural look that the whole kit is going to give you. I'm not too crazy about the consistency. It almost feels like it's too greasy. The great thing about this tint is it gives you an even color and it last for a decent amount of time. I put it on at night and the next morning I still have that nice natural pink lips! Granted that I didn't do anything with my lips. Once a lip tint dries, some gives you a gradient effect on your lips but this one looks nice and even. I'm not sure if I'll buy another one because I don't really like the product's texture.


         I hope this helps! I just want to remind you, if you're planning to try bareMinerals products buying an insider kit is the practical way to go because it's a much cheaper alternative and you get to try more products! Alright talk to you on my next post! I do have a video of this review. And you get to see what the products actually look like. I'll try to attach it to this post if I can! Take care!!!


The Urban Decay De Slick Setting Spray Review!!!!


    Oh my gosh!!!! This is the answer to one of my major problems!!!!!!!! I have super oily skin that after an hour of putting on my makeup, no matter what primer I use or foundation, I have to start blotting my nose and forehead because it is so shiny! I seriously can deep fry some chicken if I just squeeze it out of my sponge, brush or tissue! Urban Decay's De Slick Makeup Setting Spray is the bomb!!!!! After washing my face I apply my toner, moisturizer, primer, I spritz De Slick setting spray on my face two or three times then I put on my makeup. After putting on my makeup I spritz it on again to set it! I love it so much! I received a free sample from Ulta when I bought $50 worth of Urban Decay products and after a week I bought the full size bottle! It feels light weight and doesn't smell bad so it's great! Definitely going to be one of my regulars when I do my makeup!

How to Apply a Blush/Blusher without Looking Like a Clown

          I've seen too many girls or ladies, whatever you prefer, apply blush too heavily. They kind of look like clowns! That was mean but I can't help it, it annoys me too much. The only time I have to wear that much of a blusher is when I'm on a play because the lights really wash out people. Sometimes I feel like coming up to them and tell them that they look ridiculous with that much blusher on! I'm guessing they've never heard of the phrase: a little bit goes a long way. Anyway, enough with the ranting. Let's get down to business on how to apply a blusher.

          There are several ways to apply this, of course, but I want to share to you the two ways I do. I'm not saying you have to do it this way. I'm just saying don't apply too much.

1. The most common way to apply a blusher is on the apple of your cheeks. The easiest way to find this is by smiling. The area on your cheeks that is most "plump" would be the apple. This technique is great for younger people but for someone who has seen more years, not so much. What happens when a more mature woman smiles places her finger on the apple of her cheeks and goes back to her normal expression? The apple of her cheeks actually appears lower compare to when she was smiling. So if she or whoever is applying a blusher, I've seen several guys put on makeup for a play, applies it on the apple of their cheeks; then their cheeks would look saggier. Not so attractive. In theatre makeup, if we wanted to look older we apply the lines for wrinkles and the blusher lower than it should be because it draws the illusion of gravity being your bff.

2. What do I think is the best way to apply a blusher? I think the best way to apply your blusher is like applying a contour. By starting near the hair line of your cheeks, without smiling, and working your way towards the center of your face. This creates the illusion of a more defined cheek bone. Most of the product will be where your natural shadow would be. Because if we actually look at the shadows of our face, near the hair line would be the darkest. Again, a little bit goes a long way. There's no need to apply more of your blusher to make the cheek even because we want that gradient effect -- darker by the hair line and lighter near your nose. This trick would look great on anyone whether your immature or mature! Lol!

        I hope this helped!!! I can't stress enough how unattractive too much blusher look like. So remember, a little bit goes a long way!

Monday, April 2, 2012

Money Saving Tips When Buying Makeup!

      Makeup could be expensive. It seems like that the more expensive the product is, the better they should be! But sadly, that's untrue. There are great products that could be bought at a drugstore for a much smaller price. Here are a some tips that could help buying makeup easier on your wallet!

-Don’t be a snob; there are great drugstore makeup products out there!
-Eyeshadow may be used several ways. It can be used as a highlight for your brows, cheek bones, nose, lip and even your collar bone!
- A dark shadow is usually used to contour your crease, but if you find just the rights shade it could be used on the hollow of your cheeks, nose, temples and neck to give your face more definition.
-An eyeshadow could also be used as aneyeliner when applied wet or to set your regular liner to prevent smudging
-I prefer buying drugstore mascara, since they don’t last as long as other makeup products. They give the same results anyway!
- Blushes and bronzers could also be used as eyeshadows.
- There are great foundations out there such as the Neutrogena Healthy Skin and Revlon Colorstay, which has different formulation for Combo/Oily and Combo/Dry skin. Drugstore do not usually let their customers test the product, so I suggest buying your foundation, concealer or other products at a store you know will let you return the product, if you find that the shade is not right for you.
-Buy a product that has several purposes –  lipstick in a shade that you prefer and helps smooth your lips; a blush that could also be a highlight; matte eyeshadows that could be used for contouring and filling in the eyebrows; or a tinted moisturizer that has SPF.
- If you truly prefer high end products, then research the store's promotions. Apply for a rewards card from the store that has special offers for their members such as Sephora's Beauty Insider, Ulta's
Ultamate rewards card, Sally's membership and etc. You also get to have free products or services if you are a member! I know I'm dying to have that facial from Ulta!
- Some products have kits or value packages that the company assembles to promote a certain product. They usually have a better deal. Just be careful to know what products are inside. If there are five products and you just truly want one of them and don't care much for the others, then you'll be better off buying just that one product; but if you also like the accompanying products then you just might save a couple dollars! I know Bare Minerals have their Insider packs introducing a certain product. I love them and I save about $20 or more if I were to buy the products separately!
- Palettes are actually a thriftier way to buy makeup. If you know that you like the consistency of the eyeshadow brand then buy their palettes instead of buying one eyeshadow at a time. The Naked palette from Urban Decay comes with 12 eyeshadows, Primer Potion sample, and a brush all for $50. If we compute just the eyeshadows themselves for $50, it'll come out as $4.2 per shadow! That's much better on the wallet compare to the $16 per eyeshadow. Ulta, Sephora, Stila, Tarte and many more compose their own palette. So next time you want to buy a high end eyeshadow, look for the palette first, it just might save you money.
-Before you buy any high end product, check the tester to see if it really works well for you. You could also ask if the store has a sample of the product so you don't have to make a commitment to that product which will most likely cost a lot of money. If you're having a hard time deciding which shade goes well for you, then ask a consultant for help, they will be more than happy to assist you.


       I hope this helped you! Have a great day!

Sunday, April 1, 2012

Makeup, Where to Start?!?!?!?!


When I was a teenager, I didn’t know where to start. I didn't know what products to buy or what shade. I did not have any help from my mom because she doesn't put on makeup anyway and I didn't want to tell her and my dad that I wanted to put on makeup! But thankfully, they didn't get mad at me when they saw me wearing makeup. I guess they said I've always loved makeup since I was a little girl. So, the first products I ever got were a mascara, I can't remember what brand, and an NYC eyeliner. I really felt that those two made a big difference for my look, but now that I know more about what to buy, I want to share to you what I think would be great products to start off your collection. Keep in mind that the products I will mention are the ones that work for me; I hope they will for you as well. At least this will give you an idea of what items to start off with your kit. I will also give an example for a drugstore brand and a higher end makeup, if possible.

Foundation: this product is blended all over the face to smoothen out the skin and starts us off with a new canvas. It could be powder, liquid or cream. Powder is best used for an oily skin and could be also used to set a liquid or cream foundation. Liquid foundations could be used for dry, normal or oily skin depending on the formula. And a cream foundation is best if your skin tends to be on the dryer side.
           -Revlon Colorstay (combo,oily,dry)
           -Neutrogena Healthy Skin (dry)
           -Elf Tinted Moisturizer (combo, dry)
           -Loreal Tru Match (combo,oily)
           -Sephora Mattifying foundation (oily)

Concealer: used to hide any blemishes such as pimples, scars or dark under eyes.
           -Revlon Photoready Concealer
           -Garnier BB Eye Roll On
           -Coastal Scents Eclipse Palette
           -Bare Minerals Concealer

Eyeshadows: to add color and definition to the eye lids.
           -Wet n' Wild Color Icon Eyeshadows
           -Elf 32 eyeshadow palette
           -Sally Girl eyeshadows
           -NYX Nude on Nude palette
           -Naked Palette by Urban Decay

Eyeliner: applied to lash lines or as close as possible.
           -Wet n' Wild Color Icon eyeliners
          -Milani Liquid Eyeliners
          -Bare Minerals Round the Clock Eyeliners

Mascara: swept onto lashes to get the desired look.
          -Maybelline Falsies Volum Express
          -L’oreal voluminous black
          -Bare Minerals Definition

Blush: applied on the cheeks for a flushed and lively look.
          -Elf blushes
          -Tarte Amazonian clay blushes
          -Bare minerals powder blushes
          -Milani blushes
          -Covergirl blushes
          -Wet n wild Color Icon blushes

Lipstick/chapsticks/lipgloss: swiped on the lips to ads color.
          -Palladio mineral chapsticks
          -Maybelline Colorsational lipsticks
          -Elf Studio lipsticks
          -Ulta mineral lip color
          -Bare minerals Pretty Amazing lip color
          -Sephora Lip Attitude lipsticks

           I hope this helped your quest on finding your starter makeup! I'll post a video about this on YouTube and attach it to this article! Enjoy the new you!

Thursday, March 29, 2012

Prevent that Cakey Look! My Updated Foundation Routine 3/29/12

           So, every once in a while we find ourselves finding new products that we would love to try and for me it’s been the Revlon Colorstay foundation. I worked my routine around this new product. I found that I really love this liquid foundation. It gives me enough coverage to last the whole day and it doesn’t make my face look oily or dry. I did buy the foundation that is meant for combination normal/oily skin. And when I took it to Philippines, no matter how sweaty or oily I got I still had the foundation on! I admit it’s not just the foundation; it also has to base upon what other products you’re using. If you, have oily skin just like me and you use oil based primer then there goes that matte perfection. Therefore, you have to think the other products you use. Now, if you have dry skin, Revlon does have the same Colorstay foundation but for combination normal/dry skin. An oil based primer would also be beneficial since it’ll give your face that extra moisture. I also, found that Neutrogena Healthy Skin is perfect for that dewy look. I realized this when my face was super dry during the winter months. Let’s get started:

·         I start with my Olay toner and let that dry on my face.

·         I then apply a tiny amount of Olay Complete SPF 15 moisturizer and let that set in for a good amount of time. You can have breakfast while waiting for this to set, or the way I do it is I put on my clothes and fix my hair.

·         Once, the moisturizer has seeped in, I smooth in my Rimmel Fix and Perfect PRO primer and let that dry for a couple minutes. This is when I do the next step for my routine.

·         I take a clean sponge, go to the bathroom and wet my sponge with warm to lukewarm water and squeeze out the water. You will notice that the sponge is softer and bigger.

·         After that, I dab my Revlon foundation with my finger tip on certain areas of my face such as nose, cheek, forehead, chin, jaw and under my eyes.

·         I smooth out the foundation by dabbing the sponge all over my face the way you would with a stipple brush. And blend the foundation out towards the hairline and don’t forget to take it all the way down to your jaw so as not to create a line. There really is no need to reapply foundation twice or three times since this gives your face a full coverage. If you do, then that’s when you will start having that cakey look on your face.

·         I then apply my Garnier BB eye roll on my eye circles to diminish puffiness and decrease dark circles.

·         I dab on my Revlon Photo Ready concealer on problem areas and my nose bridge to accentuate my nose.

·         I don’t set it yet since I want to give it time to settle on my face. This helps prevent that cakey look. So I do my eyes and eyebrows first.

·         When I finish with my eyes, that’s when I set my foundation with my Sephora Matte Press Powder Foundation.

·         And wala! It’s all done! Now, you may apply whatever blush, bronzer, highlight and lipstick you prefer! Enjoy your look!

Friday, February 10, 2012

Prevent Eyeliner and Mascara Smudging

          Raccoon eyes are so unattractive and annoying. Eyeshadow underneath the eyes for a smoky eye effect is wonderful, but when it starts looking like you've got the worst eye bags ever, not so much. Smudging underneath the eyes tends to happen much more during the summer or whenever you sweat. I have several tips I want to share to you. Keep in mind that we have different skin and some of these might not work for you, but just try them and see what happens.

Prevent mascara smudging
Curl your eyelashes for 20-30 seconds each. Also, if you have long eyelashes curl it in two areas: close to the root and near the tips to give it a more natural effect.
Wear waterproof mascara. Waterproof or new mascara tends to be wet and that makes it easier to smudge on your skin. I advise taking off the excess product by scraping it on the tip of the bottle. Some like to put in on their hands but I don't want to waste my product so I just put it in my bottle. Apply on your eyes. You don't have to dip it in again since you just want a little bit of product anyway. This also prevents clumping. If you really like a lot of mascara on your lashes, let it the first coat of mascara dry first, then repeat the whole process.

Prevent eyeliner smudging
Wear waterproof eyeliner.
Wear a primer.
After applying the eyeliner, dab on a matching eyeshadow on top of the liner to extend it wear time.

      I hope these tips help! If you have any you want to share, just let me know and I would greatly appreciate it!

Beauty 2 Go!

I have been traveling a lot lately and I noticed what products I usually carry with me. I don't bring a massively huge purse so these items will be great for those girls who don't want to carry a lot! Also, if youfind that what I'm about to tell you is too much, you can always change it up according to your preference. I love bribing these things when I travel or for regular outing such as going to the mall, school or work. You don't have to use these specific products, again adapt it to whatever works for you or the situation, thee are just the things I prefer. So, the things that are in my makeup bag or purse are:          
          Mattifying powder by Elf. I want to try the Mally one so if you have any comments let me         know.         
         Lipstick of the day
         Concealer
         Possibly a blush
         Hand sanitizer
         Wet wipes for sticky situations
         Tissue for runny noses
         Sanitary napkins/pads/tampon
         Brush
         Hair Tie
         Bobby Pins
         Moisturizer
         4 pc. brush set from Flirt!
        Pain Reliever
        Body Spray
        Band aid for cuts and blisters

That seems a lot, but those things are essential whenever I travel. I might take some things out for work or school but that's the main things I like to bring. I hope this helps. I'm trying to post much more often and I hope I can do that! So next time I'll give tips on how to prevent eyeliner and mascara smudging!